

Tutorial: The Complete Guide to Integrating Zoom Webinar with Hubspot
[Last Updated: 6 September, 2018]
Many marketers like you and I seek to integrate Zoom and Hubspot to control communication with webinar attendees so we can send out branded, engaging invitations, confirmation emails, and follow-up communication. If we are already using Hubspot as a CRM, the integration also allows us to capture valuable data on leads that would otherwise be divorced from our webinar.
There are numerous tutorials on the web with instructions on how to integrate a Zoom with Hubspot, but I couldn't find one that was completely exhaustive. After hours of research, gathering sources, and talking to Zoom directly, I've gathered all of the missing pieces and required details for a successful integration.
Let's get started!

1. Make Sure Your Zoom & Hubspot Accounts Are Active
You’ll also need administrator privileges in both services to complete all of the below steps.
2. Plug the Hubspot API Into Zoom
In this step, you’ll set up the “link” between Hubspot and Zoom so they can communicate with each other.
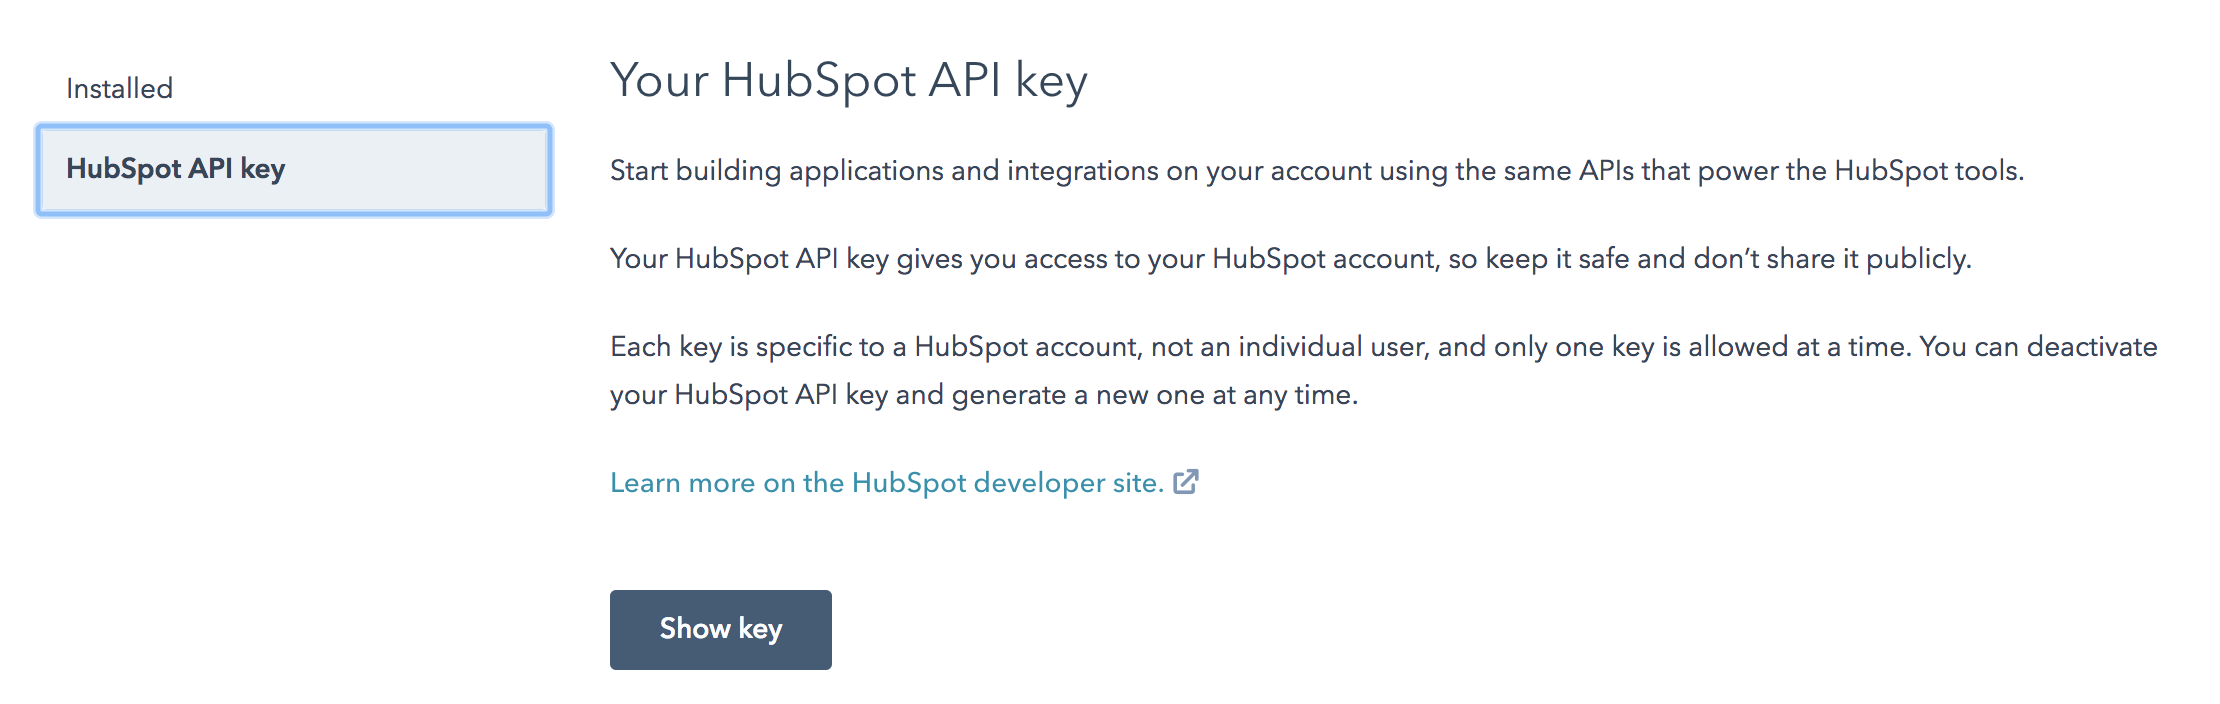
In HubSpot, click on your profile name in the top right corner and select “Integrations.” On the left, click on “HubSpot API key.” Then click “Show key” and copy the key.
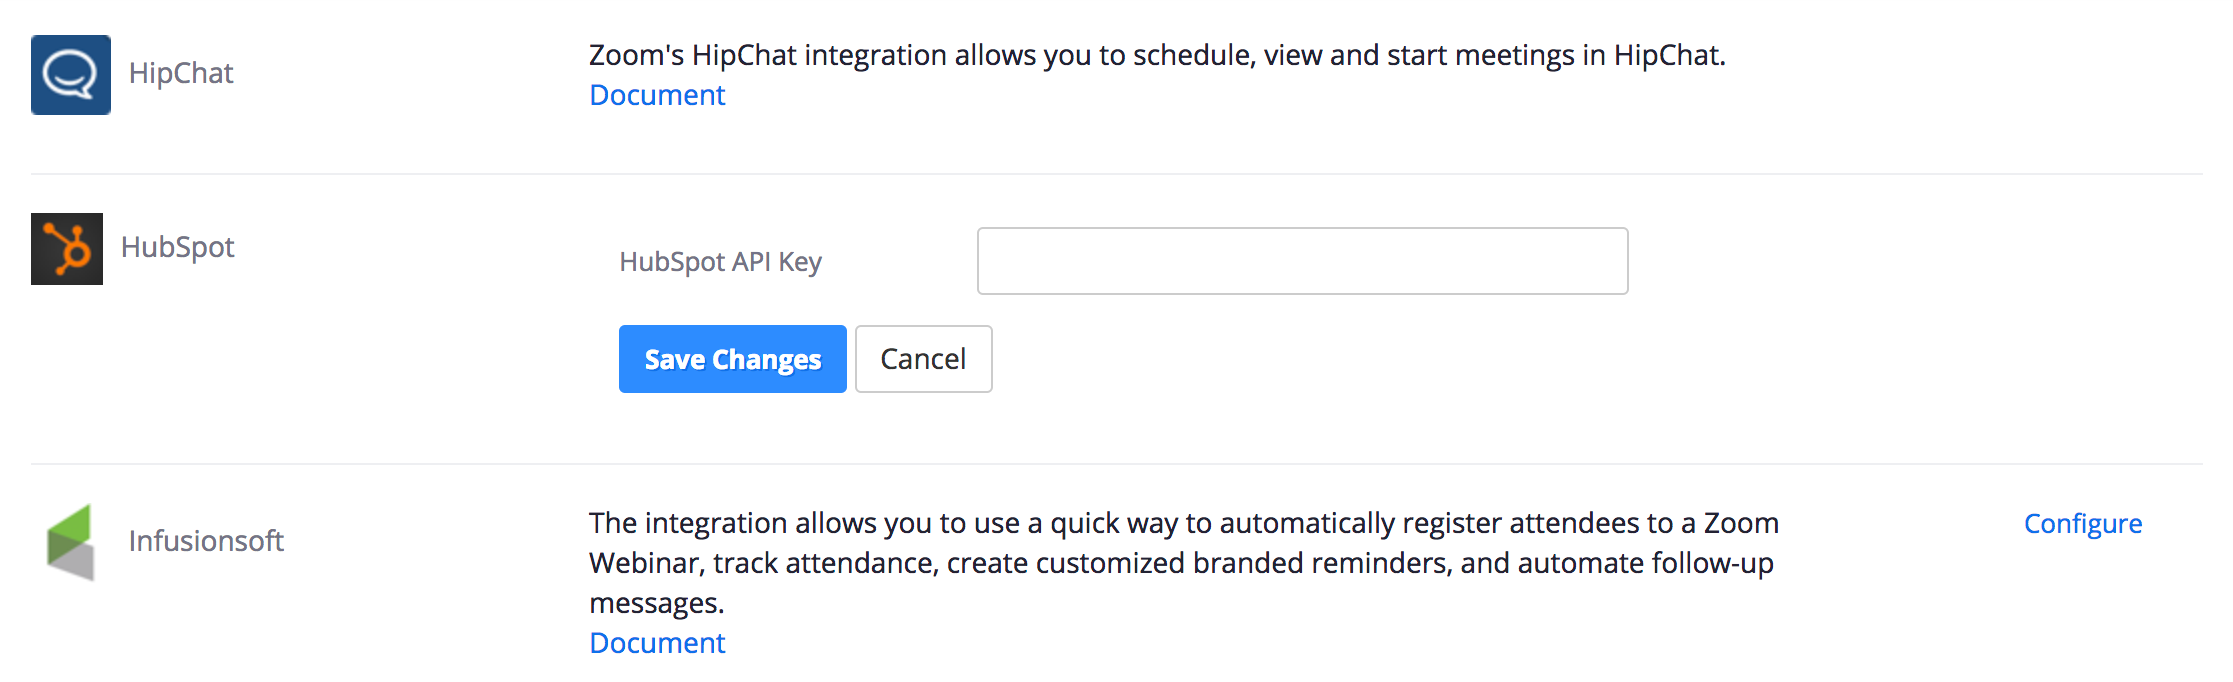
Log into Zoom. In the left-hand menu, scroll down to the “Advanced” section near the bottom of the menu and select “Integration.” Locate Hubspot in the list of integration vendors and click “Configure” to the right of its name. Paste your Hubspot API key and save changes.
3. Create a Webinar in Zoom & Adjust Settings
In Zoom’s left-hand menu, navigate to My Webinars→ Schedule a Webinar. Enter your webinar Topic, Date, Time, and other desired settings.
After you have completed all of your webinar settings, click “Schedule” at the bottom of the page.
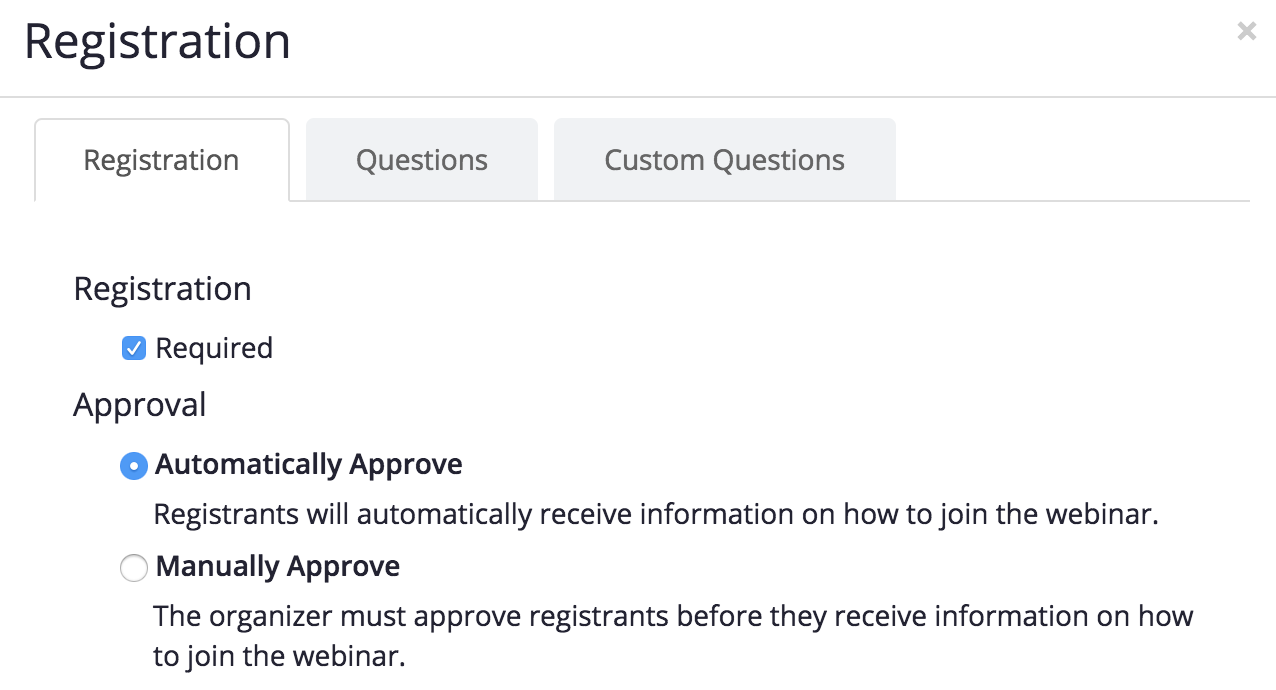
On the webinar settings page, scroll down to the bottom of the page and the Invitations tab. Next to Approval Options, click Edit. Make sure “Automatically Approve” is selected.
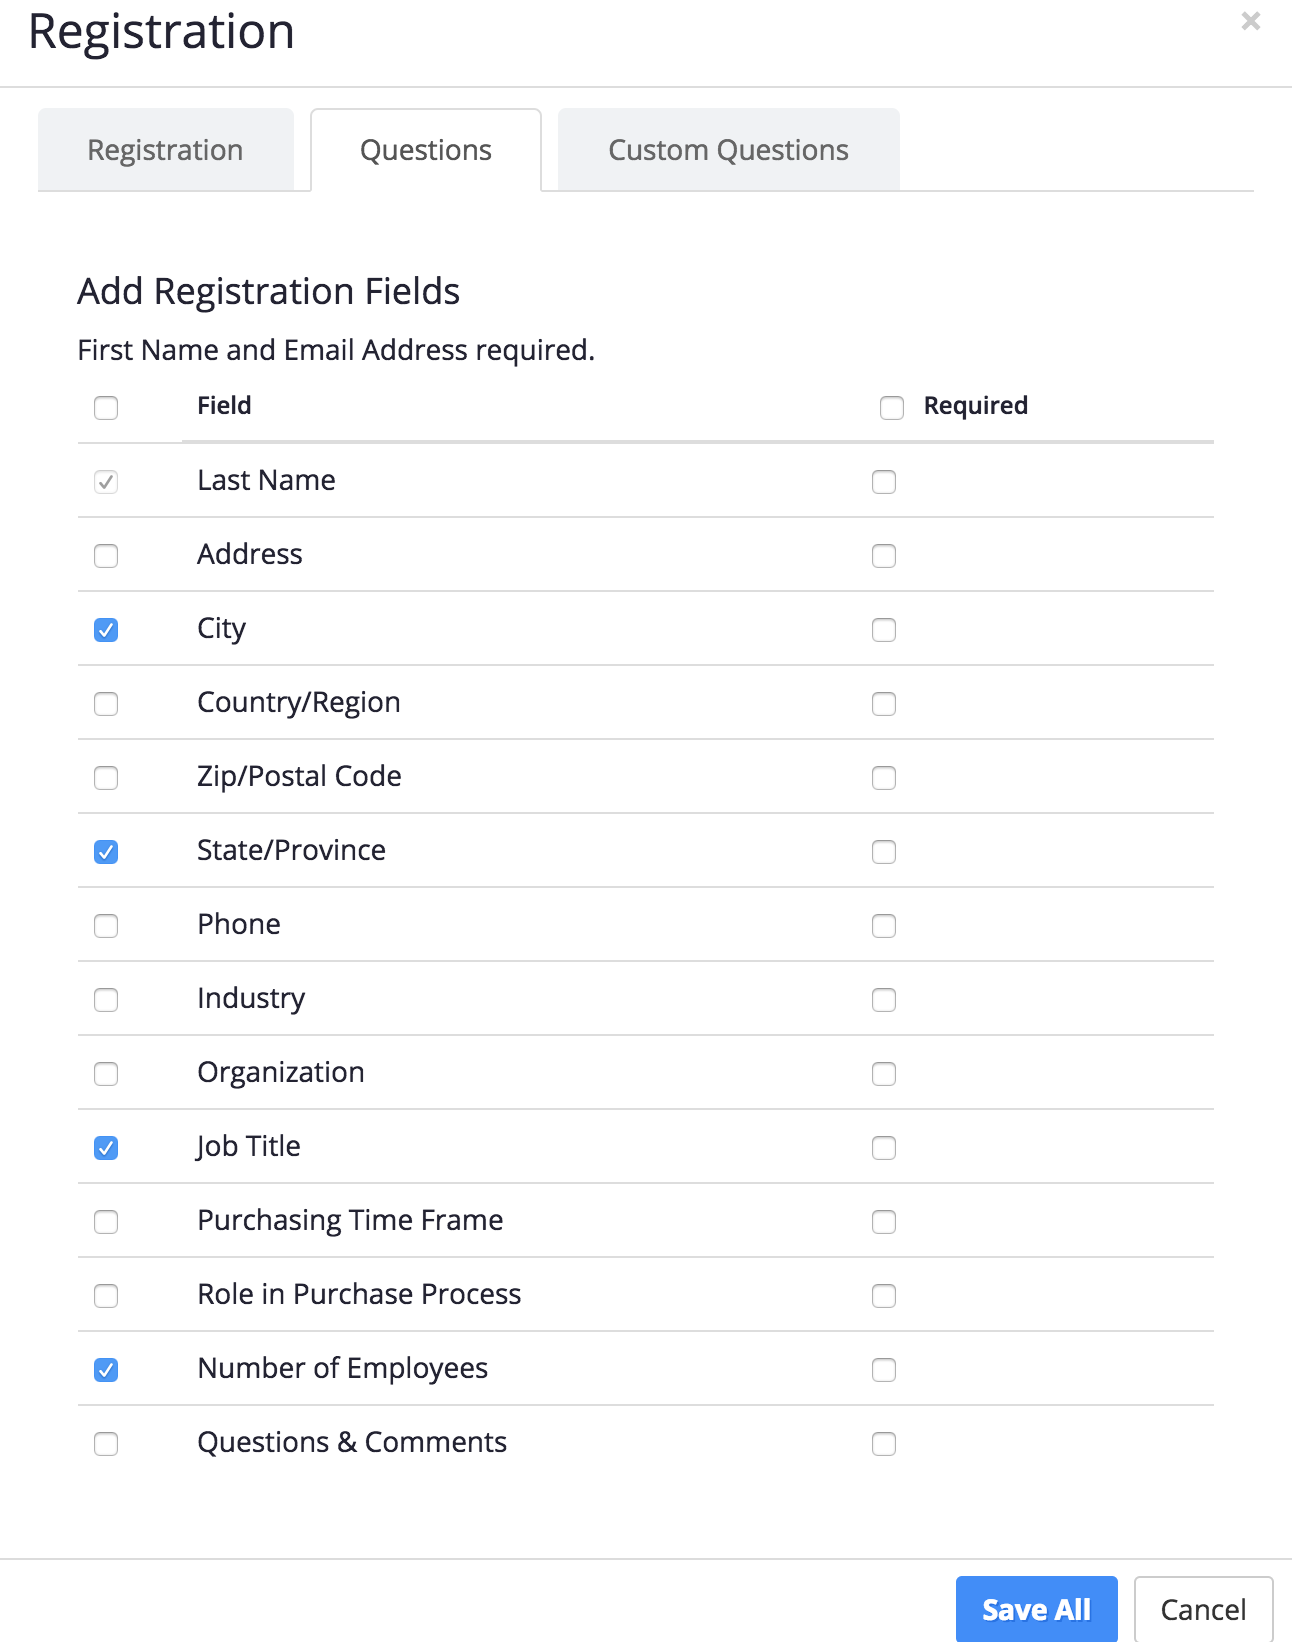
IMPORTANT: If you plan on using a Hubspot form/page to register attendees for the webinar, you’ll need to mark Zoom’s registration form fields as not required. Edit Approval Options again, and click on the Questions tab, and deselect all of the Required boxes to prevent any of the Zoom registration form fields from being required. Save.
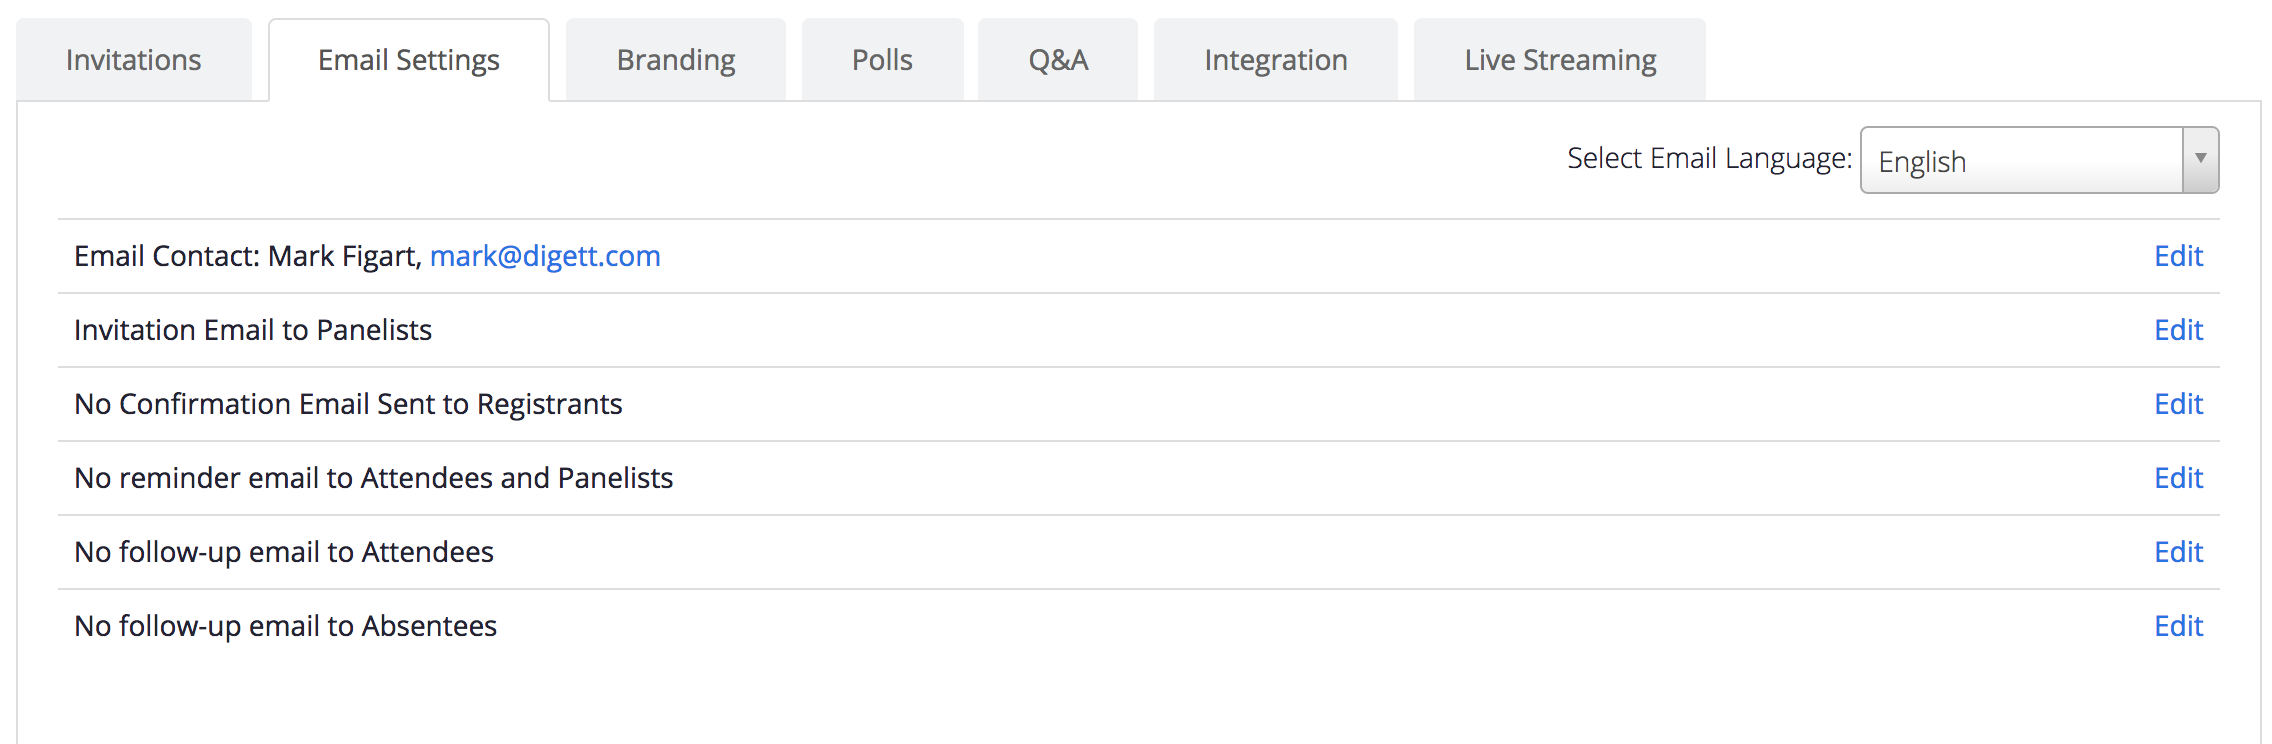
If you are using Hubspot for notification emails, turn off Zoom’s emails on the Email Settings tab at the bottom of the page by clicking Edit next to each email and unchecking the boxes to send that email.
4. Create Hubspot Forms, Landing Pages, and Emails
Content you’ll need to create in Hubspot:
- Registration form
- Registration landing page
- Registration thank you page (to redirect users to after they submit the registration form)
- Registration email confirmation with unique join link
- An automated workflow to tie the above 4 items together and to insert the Zoom webhook.
- Reminder emails (Optional, but will remind attendees to join the webinar)
- Follow up emails (Optional, but can be used to send attendees and absentees the webinar recording or additional content after the webinar has wrapped)
Create all your Hubspot content as referenced above.
5. Create Hubspot Registration Workflow and Zoom Webhook
Create a workflow to automate the registration process and complete your integration with Zoom.
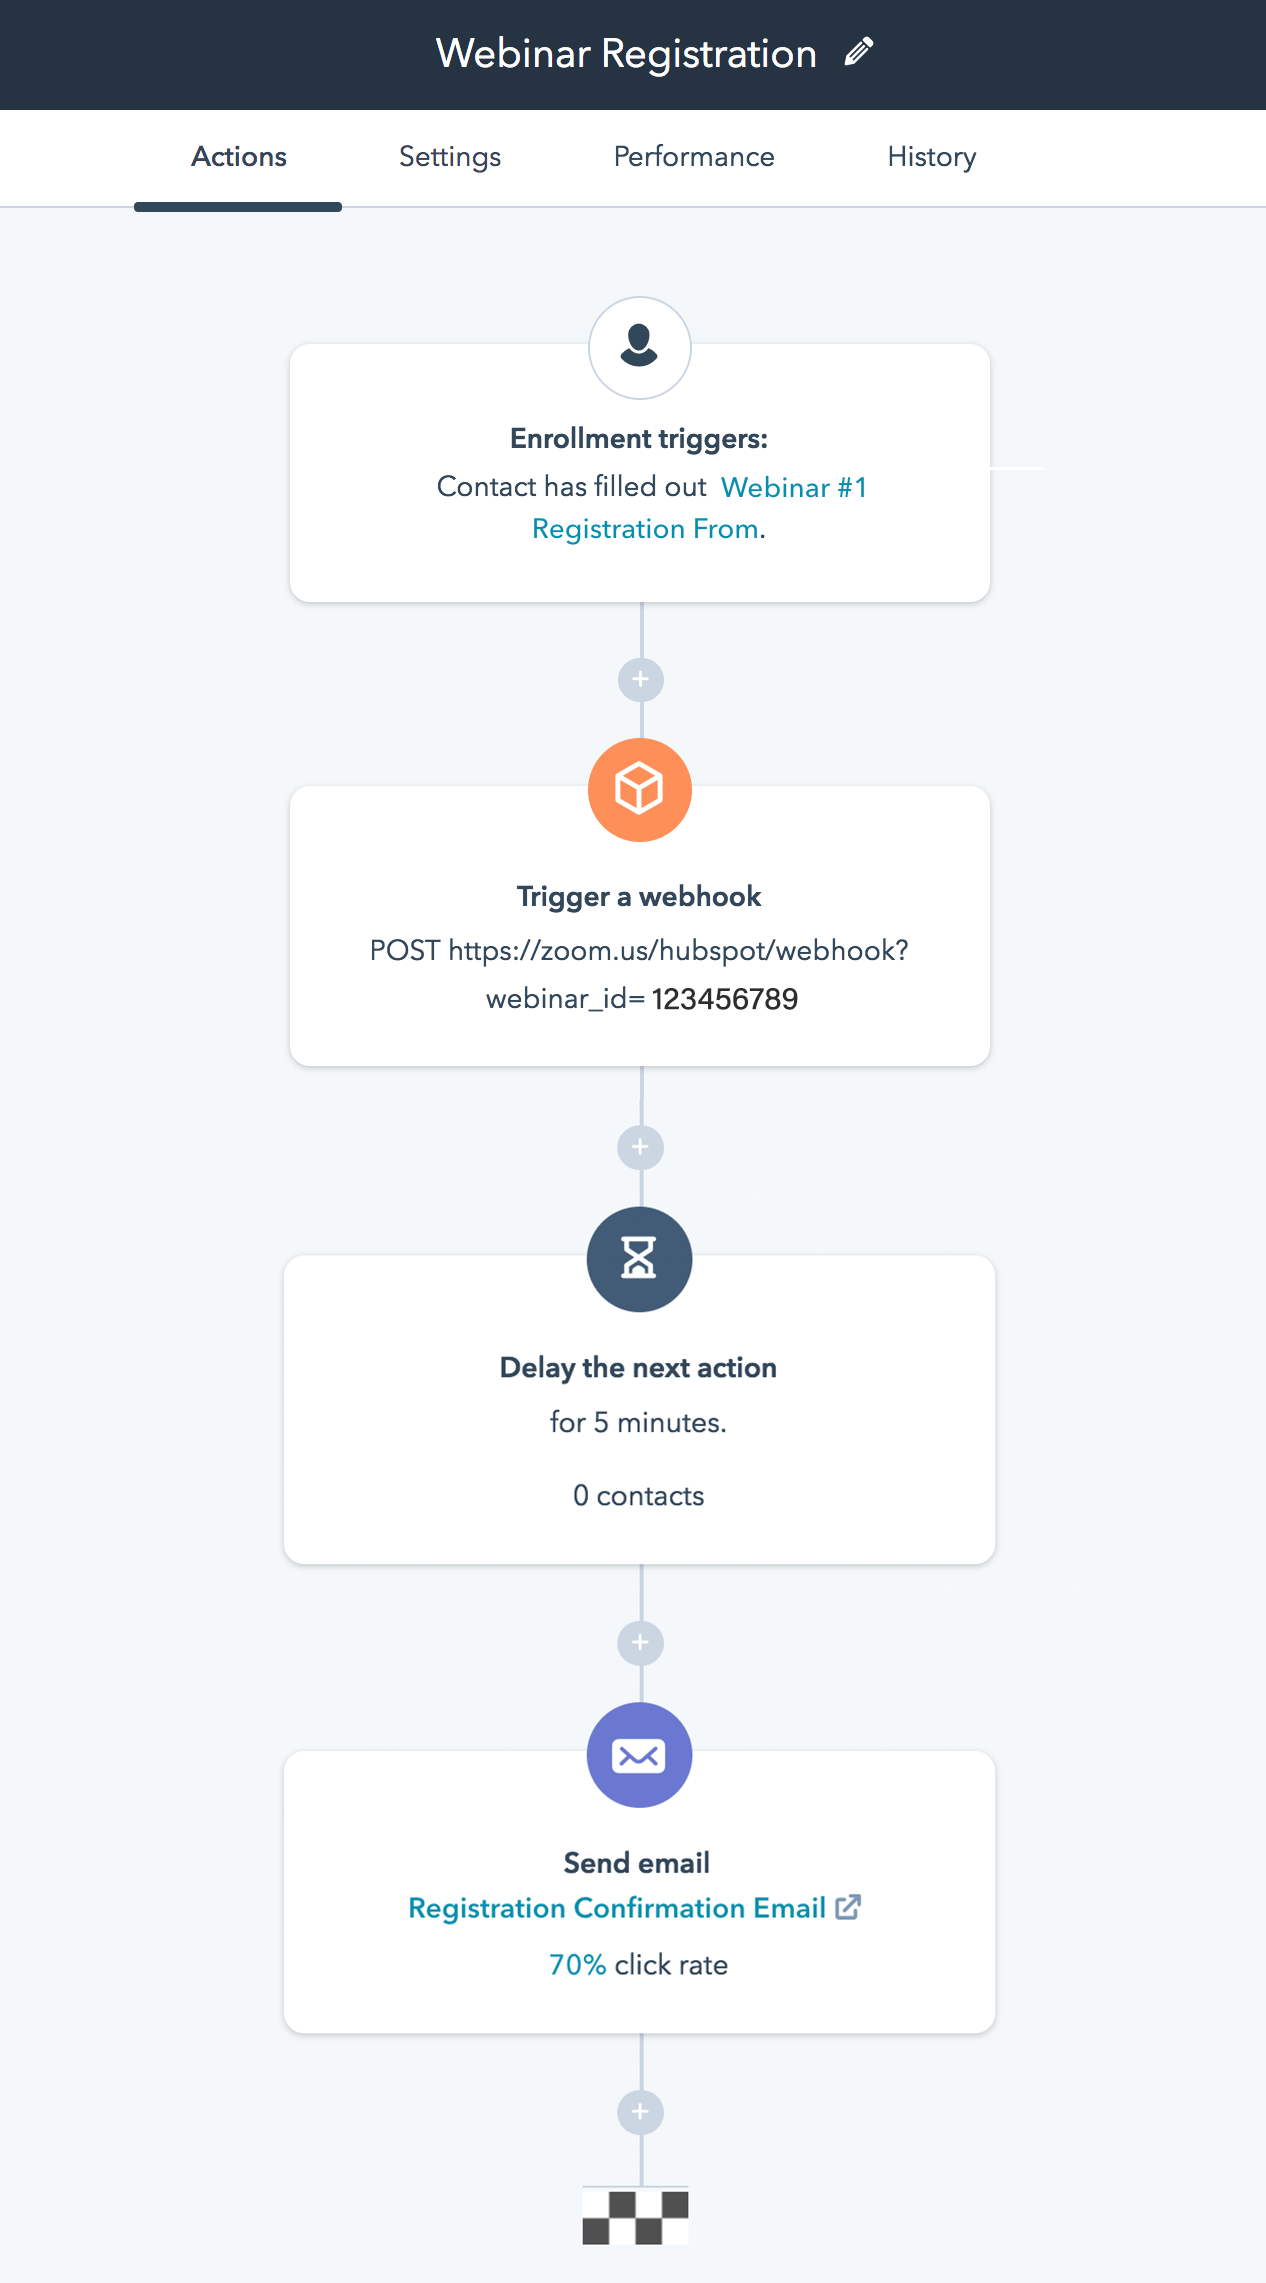
Set the Enrollment Trigger as Contact has filled out your webinar registration form. Next in your workflow, add the “Trigger a webhook” action and use “POST” as the Method. Head over to Zoom on your Webinar settings page and copy the Webinar ID, a 9-digit number near the top of the page just below the time field.
Create your webhook URL. Remove the dashes from your webinar ID and paste at the end of this URL: https://zoom.us/hubspot/webhook?webinar_id=[WebinarID]
For example, your URL could be https://zoom.us/hubspot/webhook?webinar_id=123456789
Place your webhook URL in the field of the same name in the Hubspot Trigger a webhook config panel (below where you set POST as the method), leave “Use authentication” unchecked, and click Save.
As the next item in your workflow, add a delay of 5 minutes. According to Zoom, this gives Zoom and Hubspot’s systems time to sync and send data to each other.
Add the final item in your workflow: send your registration confirmation email.
You’ll need to run through a test of the workflow in order for the Webhook to trigger and enable you to create the custom join link for the next step. In Hubspot, click on Test in the top right corner and select a Hubspot user to run your test with (likely yourself) and click “Enroll test contact.”
Run your test and ensure you receive the registration email in your inbox. Head over to Zoom to ensure your test user was registered: In Zoom, go to your webinar, scroll down to the “Manage Attendees” section, and click “View.”
6. Add Unique Join Link to Registration Confirmation Email
In Hubspot, edit your registration confirmation email.
Click in the main body of the email where you would like the unique to be. On the text editing toolbar, towards the right side, click on the person icon called “Insert personalization token.”
“Type” should be set to “Contacts.” Click the drop-down arrow below “Property” and search for “Webinar Join Link.” Note that this property will only be visible if you have completed a test run of the workflow in the previous step.
Select “Webinar Join Link” and click “Insert.” You should see your new token in the email body.

You’ll need to edit the token code for it to work properly. In the email body settings box, click the “</>” symbol to view the code for the email. Locate your webinar join link code, which should look like:
{{contact.webinar_joinlink}}
Replace this code with <a href=”{{contact.webinar_joinlink}}”> {{contact.webinar_joinlink}} </a>
Take extra care when you copy the above code that you don’t have duplicate quotation marks (this can happen when copying and pasting this code). There should only be 1 set of quotation marks around the first instance of ”{{contact.webinar_joinlink}}”.
Make sure you save all the changes to your email.
7. Test, Test, Test!
Ensure all of your content is published (including your workflow). Run through the process and ensure you receive all email communications as expected. Pay careful attention to your unique join link in your registration confirmation email: click on it and ensure it takes you to Zoom and the specific webinar.
8. Schedule Any Remaining Hubspot Content (Reminder Emails, Follow Up Emails)
This content likely won’t be part of your workflow since it is probably date/time specific. You can schedule this content to send ahead of time or simply manually send when you'd like.
---
Sources:
How to Do a Webinar with Hubspot and Zoom - Smart Bug Media
Setting Up Hubspot Integration - Zoom
MONTHLY MARKETING INSIGHTS.
Get thought-provoking and actionable insights to improve how your firm makes a connection with your customers.


LEAVE A COMMENT